Chapter 2: First Steps – Interface, Preferences and Model Setup in Plant Simulation
This chapter will introduce you to first steps in Plant Simulation and help you to get familiar with the graphical user interface of Plant Simulation. After completing this chapter, you will be able to:
- Launch and set preferences of Plant Simulation
- Understand the working environment, toolbars and ribbon menus in Plant Simulation
Getting started
After you have installed Plant Simulation, double-click on the Plant Simulation desktop shortcut or select the program from Windows start menu to launch Plant Simulation. The start page of Plant Simulation will open. From the start page, you can choose to create a new model, open an existing model, as well as to view example models, demo videos and tutorials. The start page also includes a link to the Plant Simulation community forum where you can discuss modeling questions with other Plant Simulation users.
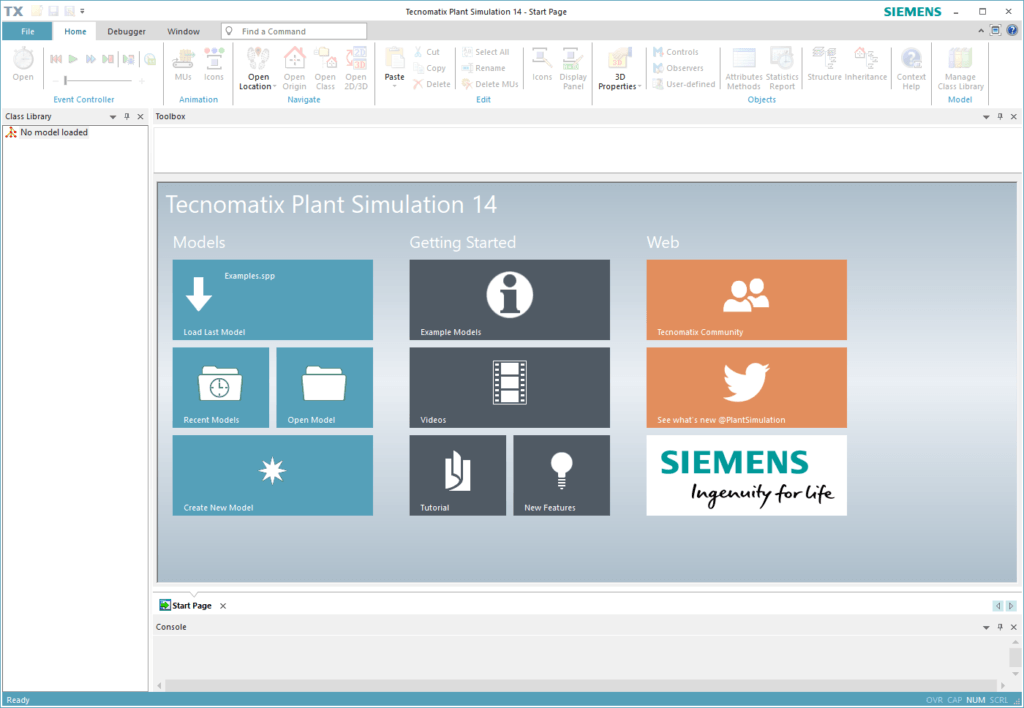
Figure 1: Plant Simulation start page
Tips: Plant Simulation is available in different languages. By default, Plant Simulation will run in the same language as your system language. You can configure the program language using the start options of Plant Simulation.
- Create a desktop shortcut for Plant Simulation
- Right-click on the shortcut and select Properties from the context menu
- Extend the path to Plant Simulation in the target box with desired start options, for example:
- If you want to change the program language of Plant Simulation, enter /UILanguage:<Language> (e.g. /UILanguage:DEU for German and /UILanguage:ENU for English)
- If you want Plant Simulation to save your model every defined time intervals, enter -a <TimeIntervalInMinutes> (e.g. -a 10)
- You can find all possible start options in Tecnomatix Plant Simulation Help > Setting-Up and Starting > Starting Plant Simulation > Entering Start Options.
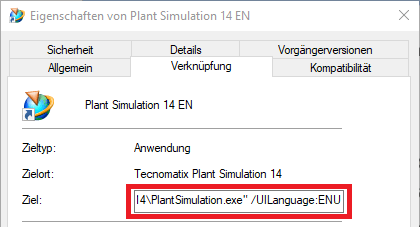
Figure 2: Changing language in the start options
Setting preferences
Before you start working with Plant Simulation, you might want to change some of the default settings that affect your simulation model.
- If you want to change the setting for a specific model, select File → Model Settings. This option is only available after you open a model in Plant Simulation and will only apply to the active model.
- If you want to change general settings which will apply to new models, select File → Preferences. This is also required to enter the license information before you create any new model in Plant Simulation.
In the Preference window, you can change the model language, date and time format, simulation units, and timescale among other things. To enter license information, navigate to the License tab. Select the correct License type from the drop-down menu. If you have a License file, click on the folder icon to navigate to the license file’s path. If you get your license from a license server, enter the address and port of your license server. Click OK and restart the program for the change to take effect.
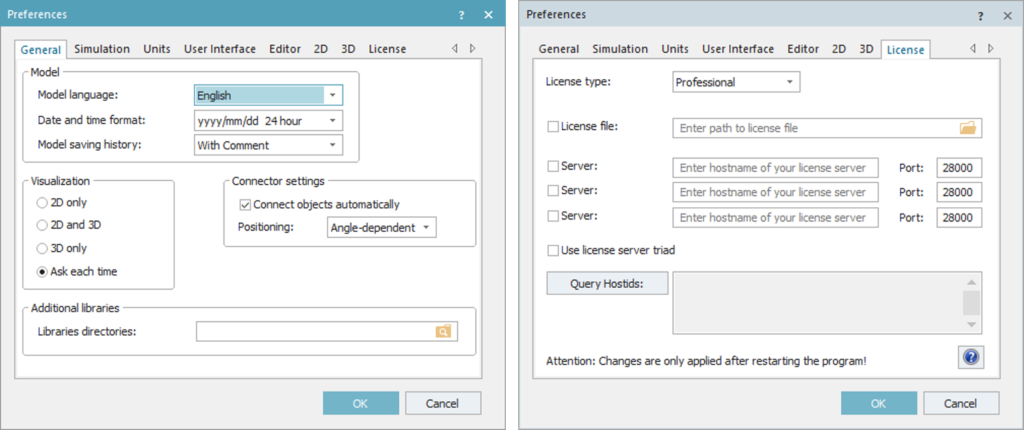
Figure 3: Preferences window – General tab (left) and License tab (right)
Working environment
Click on Create New Model on Plant Simulation start page or select File → New to create a new model. Plant Simulation will ask whether you want to create the model in 2D or in 3D. If you select 2D for example, you can always activate the 3D visualization later and vice versa. Choose one of the option and Plant Simulation will automatically create a new model frame and load available object classes.
The graphical user interface (GUI) of Plant Simulation consists of different sections, as shown in the figure below. The numbered sections are:
- Ribbon menu
- Class library window
- Toolbox with shortcut symbols
- Model frame window
- Console window
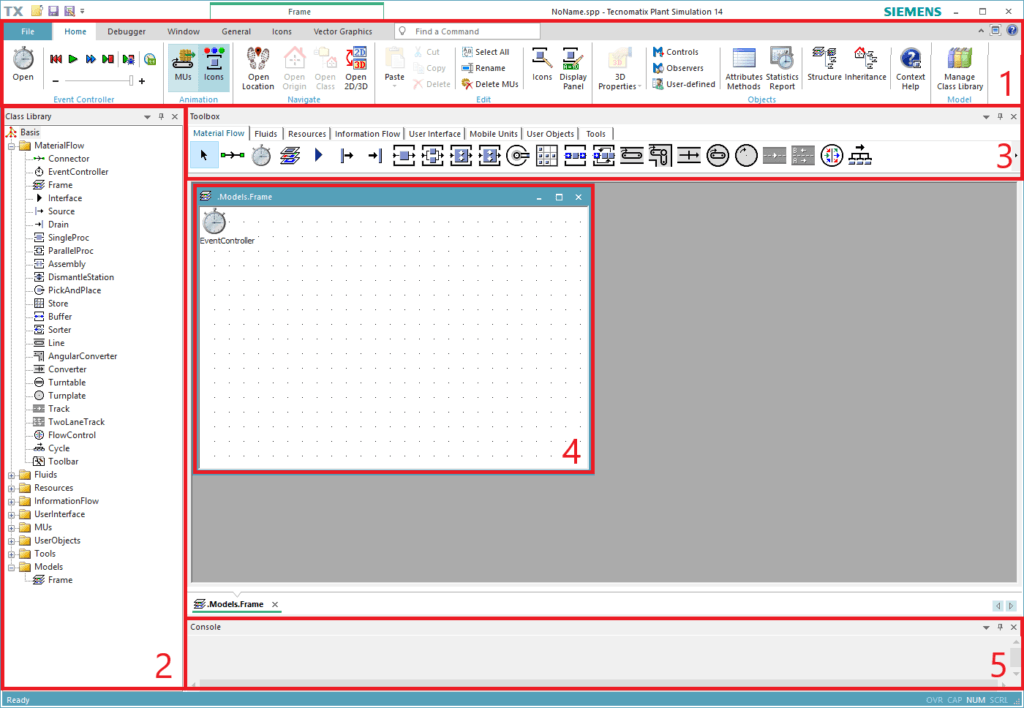
Figure 4: Working environment in Plant Simulation
Ribbon menu
Plant Simulation uses the ribbon interface to provide quick access to general functions and toolbars. The toolbars are grouped in a number of ribbon tabs. There are default ribbon tabs and object-specific ribbon tabs. You can also modify and customize the ribbon by right-clicking on an empty ribbon area and select Customize the Ribbon… from the context menu as shown in the figure below.
The default ribbon tabs are always displayed in the Plant Simulation window. These are Home, Debugger, and Window ribbon tab. The Window ribbon tab, as shown in the figure below, contains toolbars to toggle the display for each GUI section. For example, you can display or hide the Class Library or the Toolbox by clicking on the corresponding icon. If you create a simulation model in 2D, you can also activate the 3D model using the Activate 3D icon in the Window ribbon tab.

Figure 5: Window ribbon tab
Object-specific ribbon tabs are only displayed if the specific object is selected or activated in the simulation model. For example, if you are currently working within a frame, the Frame ribbon group consisting of General, Icons, and Vector Graphics ribbon tab, will be displayed beside the default ribbon tabs. Other objects which provide object-specific ribbon tabs are for example 3D Viewer, Method, Icon Editor, and TableFile.

Figure 6: Frame ribbon group – General ribbon tab
Class library and toolbox
If you create a new model or open an existing model in Plant Simulation, the model file will load the Class Library with its available object classes. By default, the Class Library contains a folder with MaterialFlow, Resource, InformationFlow, MUs, and UserInterface objects, as well as Models and Tools folder. The structure of the Class Library looks similar to the one of Windows Explorer. You can modify or extend this structure as needed.
If you use Plant Simulation with a license that limits the number of objects in a simulation model, the Basis tree in the Class Library will show the number of used and maximum possible objects in the model. You can add or remove an object class from the class library by clicking on Manage Class Library ![]() from the Home ribbon tab.
from the Home ribbon tab.
- The Basic Objects tab contains built-in object classes that can be loaded or removed from the simulation model. It also shows which license type is required in order to be able to load the object.
- In the Libraries tab, you can select additional libraries. These can be either built-in libraries or self-developed libraries. The currently used version is shown for each loaded library.
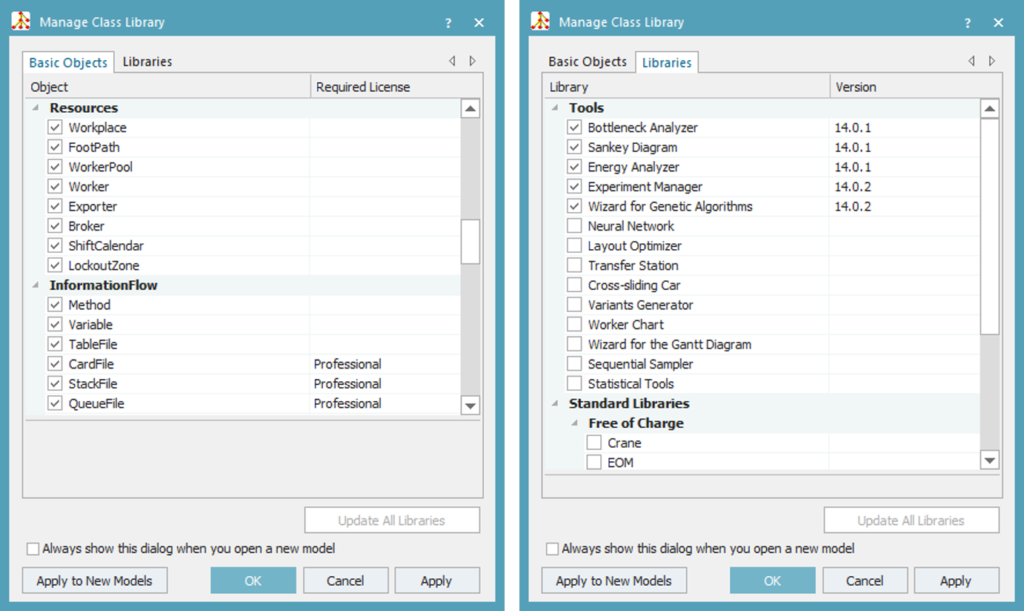
Figure 7: Manage Class Library dialog
The Toolbox is a container for the different Plant Simulation toolbars that hold the objects of the Class Library. The Toolbox allows you for an easy and fast access to object classes during the modeling.

Figure 8: Material Flow Toolbox
Model frame and console window
Your simulation model is always created within the Frame ![]() . By default, Plant Simulation will place a Frame under the Models folder when you create a new model. You can use this as your main frame.
. By default, Plant Simulation will place a Frame under the Models folder when you create a new model. You can use this as your main frame.
In the course of this tutorial, we will refer to objects in the Class Library and Toolbox as class objects and objects inserted in the frame as instance objects. We will cover more about object inheritance in the next chapter. There are several ways to insert objects from the Class Library into the frame, as shown in the figure below.
- Drag & drop a class object from the Class Library into the Frame window.
- Drag & drop a class object from the Toolbox into the Frame window.
- Left-click on a class object in the Toolbox and left-click again on the desired position in the Frame
Tips: You can also insert multiple instances of the same class object by pressing and holding down the Ctrl-key while you left-click in the Frame window. This way, you do not have to return to the Toolbox each time after inserting an object.
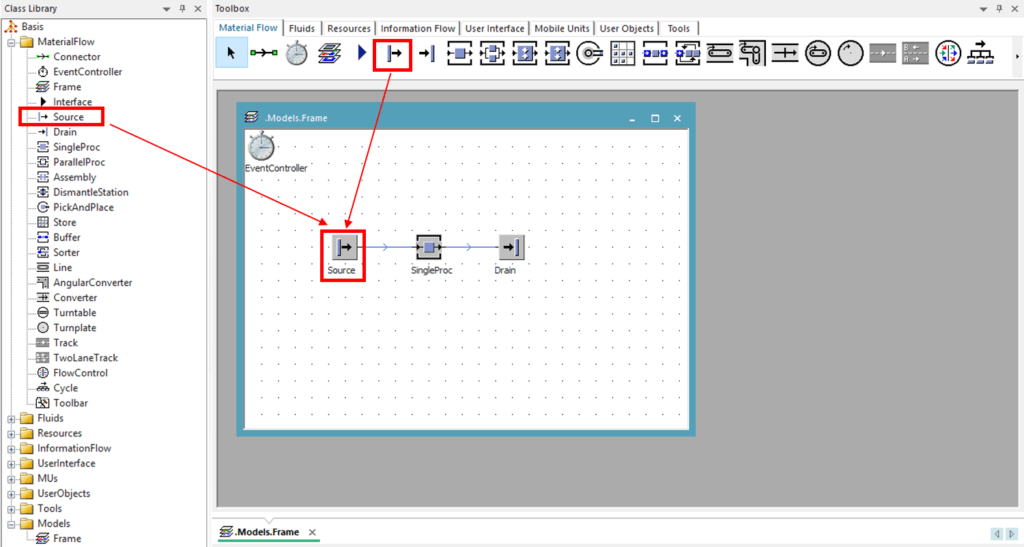
Figure 9: Modeling in Frame
In the Class Library, you can create any number of frames at any hierarchical levels. This is especially useful if you want to divide your simulation model into sub-models. This way, you can model parts or area of a larger simulation model independently using sub-frames. You can then insert any number of sub-frames into another frame or into your main frame to create a hierarchical model structure.